Forum Discussion

 New Contributor
Help needed to start PAM4 loopback test on Stratix 10TX-SI Kit

 Frequent Contributor
Hello,
You do not need to recompile bts_config to run the loopback test. The bts_pam4.sof is the pre-built programming file you should use directly. Here is the correct end-to-end sequence:
Step 1 — Board Preparation
- Make sure SW5.1 is set to the ON position, then power up the board. Transceiver Signal Integrity FPGA Development Kit Stratix® 10 TX Edition Quick Start Guide
- Connect the Altera FPGA Download Cable (USB Type-A to Type-B) from your PC to the board's JTAG port.
Step 2 — Program the FPGA with bts_pam4.sof
Use the Quartus Prime Programmer directly with the pre-built SOF, no compilation of bts_config is required:
- In the Programmer, click Hardware Setup, select a programming device, and add the Stratix 10 TX Signal Integrity Development Kit. Ensure Mode is set to JTAG. Select the Stratix 10 device and click Add Device. In the row with your .sof, check the box for the .sof and check the box in the Program/Configure column. Click Start. Compiling and Configuring the Design Example in Hardware
Step 3 — SmartVID Warning (important for this kit)
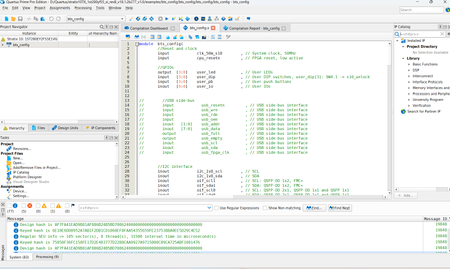
Before or immediately after programming, be aware of a known issue specific to your board (DK-SI-1STX-E-A): When programming a .sof to the Stratix 10 Transceiver TX SI Development Kit, you may see Error(19192): File .sof is incomplete - Power management settings are not set up appropriately on VID part. The workaround is to add the following SmartVID settings to the project QSF file:
set_global_assignment -name VID_OPERATION_MODE "PMBUS MASTER",
set_global_assignment -name PWRMGT_BUS_SPEED_MODE "100 KHZ",
set_global_assignment -name PWRMGT_SLAVE_DEVICE_TYPE LTM4677,
set_global_assignment -name PWRMGT_SLAVE_DEVICE0_ADDRESS 47,
set_global_assignment -name PWRMGT_SLAVE_DEVICE1_ADDRESS 48. Error(19192): File .sof is incomplete - Power management settings are not set up appropriately on VID part
If bts_pam4.sof already ships with these baked in (common in kit installer packages), you won't see the error, but keep this workaround handy.
Step 4 — Launch the Board Test System (qts_pam4_com / BTS GUI)
- Launch the
BoardTestSystem.exefile, located atstratix10TX_1st280yf55_si\examples\board_test_system. For optimal viewing, your screen resolution must be 1024×768 or greater. Transceiver Signal Integrity FPGA Development Kit Stratix® 10 TX Edition Quick Start Guide - The
qts_pam4_comexecutable (if separate) is the PAM4-specific variant of the same BTS framework, launch it from the sameexamplesdirectory.
Step 5 — BTS Main Page → PAM4 Tab → Loopback Test
- Set PMA options in the Transceiver Channel Controls section, then observe the resulting eye diagram on the oscilloscope and monitor the link statistics shown on the screen. Transceiver Signal Integrity FPGA Development Kit Stratix® 10 TX Edition Quick Start Guide
- On the PAM4 tab, select your loopback type (QSFP-DD optical loopback module or 2.4 mm SMA cable loopback), enable PRBS pattern generation, and start the BER test. The PAM4 8×51 Gbps design example has the Transceiver Toolkit enabled for bit error rate (BER) testing and link status monitoring. Stratix® 10 FPGA – TX PAM4 8 x 51 Gbps with QSFPDD 1x1 Interface Design Example
- The kit supports evaluation of transceiver performance up to 58 Gbps PAM4 and 30 Gbps NRZ, and you can generate and check PRBS patterns via the GUI, dynamically change VOD, pre-emphasis, and equalization settings to optimize performance for your channel. Transceiver Signal Integrity FPGA Development Kit Stratix® 10 TX Edition Quick Start Guide
If the BTS GUI Fails to Connect
If the BTS / Clock Controller / Power Monitor GUI fails to connect even though you can auto-detect both the system MAX V and the Stratix 10 TX in the Quartus Programmer, confirm whether the system MAX V (U8) is behaving abnormally by running get_service_paths master in System Console. To fix, reprogram U8 with max5.pof, found in the examples/max5 folder of the development kit installer package. SEVERE: java.io.IOException: Get master service paths failed!In summary: use bts_pam4.sof directly, no need to recompile bts_config. The bts_config project in your screenshot is the source project for reference/modification; the installer-provided pre-built SOF is what the BTS GUI is designed to work with out of the box.


